React and ES6 - Part 6, React and ES6 Workflow with Webpack
This is the last post of series React and ES2015 in which we are going to explore the usage of React with Webpack.
You could find links to all parts of series below:
- React and ES6 - Part 1, Introduction into ES6 and React
- React and ES6 - Part 2, React Classes and ES7 Property Initializers
- React and ES6 - Part 3, Binding to methods of React class (ES7 included)
- React and ES6 - Part 4, React Mixins when using ES6 and React
- React and ES6 - Part 5, React and ES6 Workflow with JSPM
- React and ES6 - Part 6, React and ES6 Workflow with Webpack
The code corresponding to this article is available at GitHub.


Why Webpack?
Like JSPM, Webpack is the solution for module management of your frontend application.
With Webpack, you are able to fully control all the assets of application in a convenient way.
Why is Webpack so popular? There is number of reasons:
- Webpack uses npm as a source of external modules. If you want to add React to your project, just run
npm install react. This is an added advantage because you’ll already know how to drop your favourite library into a project. - You could load almost everything, not only JavaScript. Webpack uses concept named loaders for that purpose. Just take a look at this list.
- Webpack comes with a powerful ecosystem of developer tools. Things like Hot Module Replacement (more on this later in this article) will change your development workflow dramatically.
- There is a lot of Webpack plugins for various types of tasks. In most cases, you could use already existing solutions.
- Webpack has nice logo ;)
Getting started
Let’s start adapting our application from previous parts of series.
First, we are going to install initial dev.dependencies:
npm install --save-dev webpack@1.x
npm install --save-dev babel-core
npm install --save-dev babel-preset-es2015 babel-preset-react babel-preset-stage-0
In the above list, webpack package should be self-explanatory. Babel is used for translating of JavaScript version 2015 (ES2015 or ES6) to JavaScript version 5 (should be already familiar to you if you’ve read other articles in “React and ES6” series). Since babel version 6 you have to install separate package for each additional language feature. These packages are called presets. We install es2015 preset, react preset and stage-0 preset (for things like class properties). For more information about babel 6, you could refer to my another article.
Next, install non-dev dependencies (react and react-dom packages):
npm install --save react react-domNow the most important step in any project based on Webpack.
Create the file named webpack.config.dev.js in the root folder of your project.
This file will be used by Webpack to pack all your JavaScript (in the majority of project it won’t be only JavaScript) files in one bundle
(or in multiple bundles if you would like to) that will be loaded into user’s browser.
The contents of our webpack.config.dev.js is as follows:
1
2
3
4
5
6
7
8
9
10
11
12
13
14
15
16
17
18
19
var path = require('path');
var webpack = require('webpack');

var config = {
    devtool: 'cheap-module-eval-source-map',
    entry: [
        './app.js'
    ],
    output: {
        path: path.join(__dirname, 'dist'),
        filename: 'bundle.js',
        publicPath: '/dist/'
    },
    plugins: [
        new webpack.NoErrorsPlugin()
    ]
};

module.exports = config;
Main highlights in the above code:
- Line 5. We have a choice between various strategies of enhancing debugging of the application.
You could read more about strategy
cheap-module-eval-source-mapbe clicking this link. - Lines 6-8. Here we define that
app.jswill be the main JavaScript file of an application. - Lines 9-13. This configuration specifies that Webpack will pack all modules under one file
bundle.jsand place it indist/directory.
Webpack loaders
It’s possible to load almost everything into your code with Webpack
(take a look at this list).
The concept that Webpack uses for that, is called Webpack loaders.
You could specify the file extensions to be associated with particular loader.
In our example, we’ll use babel-loader to produce ES5 JavaScript out of ES2015 / ES6 code.
First, we need to install corresponding npm package:
npm install --save-dev babel-loaderThen, adjust the configuration file webpack.config.dev.js by adding new loaders key to the exported object:
var config = {
    ... add the below code as object key ...
    module: {
        loaders: [
            {
                test: /\.js$/,
                loaders: ['babel'],
                exclude: /node_modules/
            }
        ]
    }
};

module.exports = config;
Important to note here is that we don’t allow Webpack to parse files inside node_modules directory by using exclude key. This is just slow and useless.
The finishing move will be adding file called .babelrc to the root of the project:
{
  "presets": ["react", "es2015", "stage-0"]
}
This file configures babel to use react, es2015 and stage-0 presets added previously.
Now, whenever Webpack encounters ie. import CartItem from './cartItem.js', it will load this file and transpile ES6 code inside it to ES5.
Adding Webpack Development Server
In order to run an application, we’ll need to run our files on some server.
Luckily, Webpack eco-system already provides all the needed pieces to get you started. You could use either Webpack Development Server or Webpack Development Middleware for Express.js.
We’ll use the latter one. Advantages include faster serving due to handling files in memory instead of file system and watch mode for live reloading.
Let’s install corresponding npm modules:
npm install --save-dev webpack-dev-middleware expressNext, add file named server.js to the root:
1
2
3
4
5
6
7
8
9
10
11
12
13
14
15
16
17
18
19
20
21
22
23
24
25
26
27
28
var path = require('path');
var express = require('express');
var webpack = require('webpack');
var config = require('./webpack.config.dev');

var port = 3000;
var app = express();
var compiler = webpack(config);

app.use(require('webpack-dev-middleware')(compiler, {
    noInfo: true,
    publicPath: config.output.publicPath
}));

app.use(require('webpack-hot-middleware')(compiler));

app.get('*', function (req, res) {
    res.sendFile(path.join(__dirname, 'index.html'));
});

app.listen(port, function onAppListening(err) {
    if (err) {
        console.error(err);
    } else {
        console.info('==> 🚧  Webpack development
         server listening on port %s', port);
    }
});
That is typical express.js server which uses Webpack Dev Middleware.
Adding Hot Module Reloading
Webpack Dev Middleware already includes live reloading feature. Whenever you change the code of the file, it reloads the page.
Though, Webpack has some more powerful feature called Hot Module Reloading. It reloads not the entire page, but only the part that was changed. This is handy when you are trying to fix the specific bug revealed after 10 subsequent user actions. You don’t have to manually re-do these 10 user actions when the page is reloaded. Just because only the part of the page (corresponding to your changes) was reloaded.
To have a brief look at Hot Module Reloading feature, watch this video by Dan Abramov.
In order to activate Hot Module Reloading, first install necessary npm packages:
npm install --save-dev webpack-hot-middlewareThen adjust entry and plugins fields in your webpack.config.dev.js:
var config = {
    entry: [
        './app.js',
        'webpack-hot-middleware/client'
    ],

    ...

    plugins: [
        new webpack.HotModuleReplacementPlugin(),
        new webpack.NoErrorsPlugin()
    ]
};

module.exports = config;
To further use module reloading specifically for React application there are various ways.
One of the easiest is to install special babel-preset-react-hmre babel preset:
npm install --save-dev babel-preset-react-hmreAnd adjust .babelrc file:
{
  "presets": ["react", "es2015", "stage-0"],
  "env": {
    "development": {
      "presets": ["react-hmre"]
    }
  }
}
Now the application is fully prepared for hot reloading :)
Finishing strokes
Grab the following files index.html, app.js and cartItem.js from the repository. There is nothing special inside them, that’s why I am not pasting their code here.
Adjusting package.json
Now it’s time to combine all the previous parts in one working piece of software.
We’ll do it ba adding some scripts into package.json scripts section:
{
  "name": "awesome-application",
  "version": "1.0.0",
  ...
  "scripts": {
    "start": "node server.js"
  },
  ...
}
Running the application
Run npm start (this script just runs server.js which in sequence runs Webpack we’ve setup previously),
open up http://localhost:3000 in you browser. You should see the familiar picture:
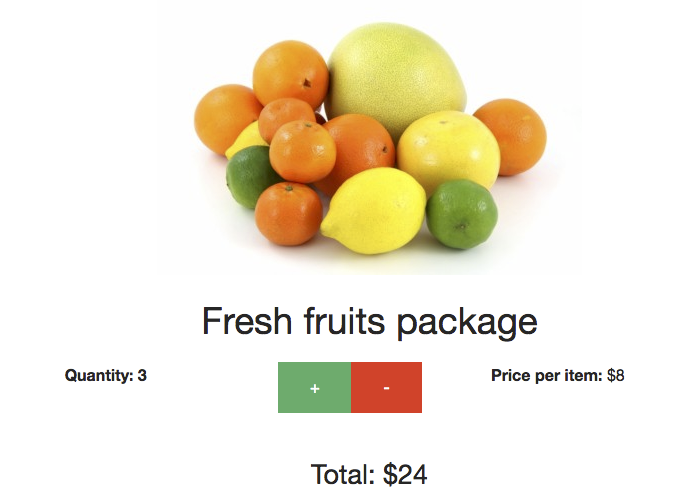
Now slightly change the render method of cartItem.js and go back to a browser.
The part of the page was reloaded. If you clicked +/- buttons of our application before, then you’ll see that total value is still there. That means that the state of application was preserved.
This is hot module reloading system in action. Very convenient, especially when you’re trying to fix some nasty bug that is revealed after some sequence of actions from the user.
Going to production with Webpack
Right now we are capable of running our own development server with hot module reloading (HMR) enabled.
But what if we want to move to production? No problems, Webpack has a solution for that.
Grab the file webpack.config.prod.js from the repository and drop it into the project. It’s similar to Webpack configuration for development mode, but with following differences:
- Hot reloading mode is disabled, just because it’s not needed in production.
- JavaScript bundle is compressed by UglifyJs using the corresponding
webpack.optimize.UglifyJsPlugin. - Environment variable
NODE_ENVis set toproduction. This is required to suppress warnings coming from React in development mode (and could be potentially used for other purposes).
Next, update scripts section of your package.json file:
{
  ...
  "scripts": {
     "start": "node server.js"
     "clean": "rimraf dist",
     "build:webpack": "NODE_ENV=production webpack --progress --colors --config webpack.config.prod.js",
     "build": "npm run clean && npm run build:webpack",
  },
  ...
}
By now, if you run npm run build, compressed file bundle.js file will be created under dist/ directory. This file is ready for production use.
This is just the start
What we’ve just learned is just scratching the surface of what Webpack is capable of.
Webpack is one of such tools that are easy to start with, but hard to master. Learning of it will pay off later.
Further Reading
- Official Webpack website
- List of Webpack loaders
- Babel 6 presets
- Upgrading to Babel 6. Babel 6 for Babelify and WebPack
- Technical details of Webpack Hot Module Replacement
- Video with process of Hot Module Reloading
- About Webpack Dev Server
- About Webpack Dev Middleware
- About multiple entry points in Webpack
- About stylesheets in Webpack